Wie installiere ich eSIM auf dem iPhone 14?
In nur vier einfachen Schritten.
Zusammenfassung
Wenn Sie ein iPhone 14 besitzen und in die Welt der eSIMs einsteigen möchten, hilft Ihnen dieser Leitfaden weiter. Wir führen Sie durch den Installationsprozess einer eSIM auf Ihrem iPhone 14, damit Sie alle Vorteile nutzen können, die sie bietet. Egal, ob Sie neu in der eSIM-Technologie sind oder einfach nur eine Auffrischung benötigen, dieser Leitfaden deckt alles ab, was Sie wissen müssen.

Vorbereiten Ihres iPhone 14 für die eSIM-Installation
Bevor Sie eine eSIM installieren, ist es immer eine gute Idee, Ihr iPhone 14 auf die neueste Softwareversion zu aktualisieren. Software-Updates enthalten oft Fehlerbehebungen und Verbesserungen, die die Leistung und Kompatibilität Ihres Geräts mit der eSIM-Technologie verbessern können.
Apple ist bekannt für sein Engagement, das beste Benutzererlebnis zu bieten, und regelmäßige Software-Updates spielen dabei eine wichtige Rolle. Indem Sie Ihr iPhone 14 auf dem neuesten Stand halten, stellen Sie sicher, dass Sie über die neuesten Funktionen und Optimierungen verfügen, wodurch Ihr eSIM-Installationsprozess noch reibungsloser wird.
Installieren der eSIM auf Ihrem iPhone 14
Es gibt zwei Hauptmöglichkeiten, eine eSIM auf Ihrem iPhone 14 zu installieren: durch Scannen des eSIM-QR-Codes, der Ihnen von Ihrem Anbieter bereitgestellt wird, oder durch manuelle Eingabe der eSIM-Informationen.
Scannen des eSIM-QR-Codes
Beginnen wir mit der einfachsten Methode – dem Scannen des eSIM-QR-Codes. Befolgen Sie dazu einfach diese Schritte:
- Gehen Sie zu Einstellungen > Mobile Daten > eSIM hinzufügen
- Wählen Sie „QR-Code verwenden“
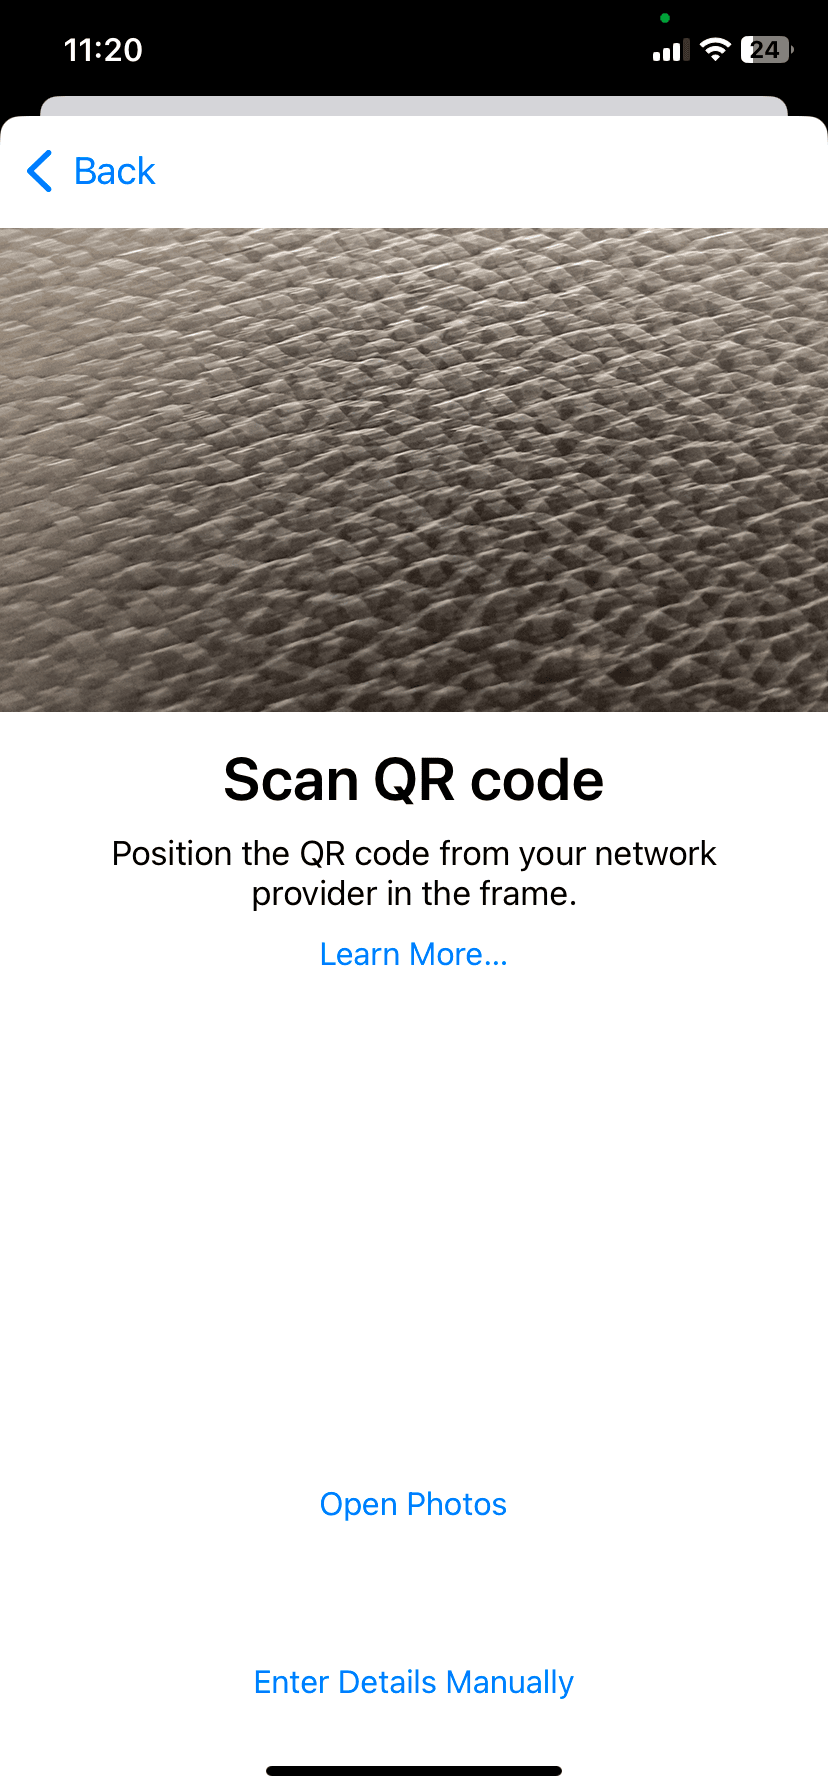
- Es erscheint ein neues Fenster, in dem Sie aufgefordert werden, den von Ihrem Netzbetreiber bereitgestellten QR-Code zu scannen.
- Folgen Sie den Anweisungen auf dem Bildschirm.

Manuelles Eingeben der eSIM-Informationen
Aber was, wenn Sie keinen eSIM-QR-Code haben? Oder der Scanvorgang aus irgendeinem Grund nicht funktioniert? Keine Sorge, Sie können die eSIM-Informationen trotzdem manuell eingeben und Ihren Plan zum Laufen bringen.
Ihr Netzbetreiber stellt Ihnen alle erforderlichen Details wie die SM-DP+-Adresse, den Aktivierungscode und alle anderen relevanten Informationen zur Verfügung.
- Gehen Sie zu Einstellungen > Mobile Daten > eSIM hinzufügen
- Wählen Sie „QR-Code verwenden“
- Es erscheint ein neues Fenster, in dem Sie aufgefordert werden, den von Ihrem Mobilfunkanbieter bereitgestellten QR-Code zu scannen. Wählen Sie „Details manuell eingeben“.
- Geben Sie die erforderlichen Angaben ein und folgen Sie den Anweisungen auf dem Bildschirm.

Einrichten Ihres Mobilfunktarifs mit eSIM
Nachdem Sie die eSIM erfolgreich auf Ihrem iPhone 14 installiert haben, ist es an der Zeit, sie als Ihren primären Mobilfunktarif festzulegen. Dieser Schritt stellt sicher, dass Ihr Gerät die eSIM für Ihre Mobilfunkverbindung verwendet.
Um diese Anpassung vorzunehmen, gehen Sie zurück zum Menü „Mobile Daten“ in der App „Einstellungen“. Sie sehen eine Liste der verfügbaren Pläne, einschließlich Ihres neu aktivierten eSIM-Plans. Wählen Sie Ihren eSIM-Plan als standardmäßigen primären Plan aus, und Ihr iPhone 14 wechselt nahtlos zur Verwendung der eSIM für alle Ihre Mobilfunkanforderungen.

Fehlerbehebung bei häufigen eSIM-Installationsproblemen
Obwohl die Installation einer eSIM auf Ihrem iPhone 14 ein unkomplizierter Vorgang ist, können dabei einige häufige Probleme auftreten. Hier sind einige Schritte zur Fehlerbehebung, die Ihnen helfen, diese Herausforderungen zu meistern.
QR-Code kann nicht gescannt werden
Wenn Sie Probleme beim Scannen des eSIM-QR-Codes haben, stellen Sie sicher, dass Sie sich in einem gut beleuchteten Bereich befinden und dass der QR-Code richtig im Kamerarahmen positioniert ist. Manchmal können die Lichtverhältnisse die Lesbarkeit von QR-Codes beeinträchtigen, daher ist eine ausreichende Beleuchtung unerlässlich. Stellen Sie außerdem sicher, dass sich keine Hindernisse oder Reflexionen auf dem QR-Code befinden, die den Scanvorgang beeinträchtigen könnten. Wenn das Problem weiterhin besteht, starten Sie Ihr Gerät neu und versuchen Sie den Scanvorgang erneut. Ein Neustart Ihres Geräts kann dazu beitragen, vorübergehende Störungen zu beheben, die die Funktionalität der Kamera beeinträchtigen könnten. Wenn alles andere fehlschlägt, versuchen Sie die manuelle Installation der eSIM.
eSIM wird nicht angezeigt
Wenn die eSIM nach dem Scannen des QR-Codes oder der manuellen Eingabe der Informationen nicht im Menü „Mobilfunktarif hinzufügen“ angezeigt wird, kann dies mehrere Gründe haben. Überprüfen Sie zunächst, ob auf Ihrem iPhone 14 das neueste Software-Update installiert ist. Software-Updates enthalten häufig Fehlerbehebungen und Verbesserungen, die Kompatibilitätsprobleme beheben können. Wenn nicht, aktualisieren Sie Ihr Gerät und versuchen Sie es erneut. Durch die Aktualisierung der Software Ihres Geräts können Sie sicherstellen, dass es mit der eSIM-Technologie kompatibel ist und diese ordnungsgemäß erkennen kann. Wenn das Problem weiterhin besteht, wenden Sie sich an Ihren Mobilfunkanbieter, um Unterstützung zu erhalten. Dieser kann überprüfen, ob die eSIM auf seiner Seite ordnungsgemäß aktiviert ist, und alle netzwerkbezogenen Probleme beheben, die dazu führen können, dass die eSIM auf Ihrem Gerät nicht angezeigt wird.
Maximieren Sie Ihr eSIM-Erlebnis
Wechseln zwischen eSIM und physischer SIM
Wenn Sie ein iPhone 14 haben, das noch über ein physisches SIM-Fach verfügt, und wenn Sie eine physische SIM für Ihre primäre Leitung verwenden, können Sie die eSIM-Technologie nutzen, um in Verbindung zu bleiben, ohne Ihre physische SIM-Karte entfernen zu müssen. Installieren Sie einfach eine eSIM und wechseln Sie problemlos zwischen ihnen, indem Sie das gewünschte Profil auswählen, das Sie für Ihre Mobilfunk- und/oder Datenverbindung verwenden möchten.
Wechseln zwischen eSIMs
Auch wenn Sie bereits eine eSIM für Ihren Hauptanschluss verwenden, können Sie zusätzliche eSIM-Profile installieren und problemlos zwischen den verschiedenen Profilen wechseln. Wenn Sie verreisen, installieren Sie einfach eine eSIM für Ihr Zielland und wählen Sie diese neue eSIM als diejenige aus, die für Ihre Datennutzung verwendet werden soll.
Was ist von zukünftigen iPhones zu erwarten?
Die eSIM-Technologie ist gekommen, um zu bleiben, und wir können davon ausgehen, dass sie in den neuesten Flaggschiffmodellen eine wichtigere Rolle spielen wird. Wenn Sie auf die Veröffentlichung des iPhone 15 warten und wissen möchten, was Sie erwartet, lesen Sie unserenBlog über die Gerüchte zum neuesten iPhone 15.