Install eSIM on iOS
Please note that installation experience may differ by model or iOS version.
If you have questions about installing eSIM onto your iOS device, please reach out to customer support via Help Center and provide screenshots of your settings.
1a). To install your eSIM via QR code:
Use your camera phone to scan the QR code provided in your email or follow the steps below. 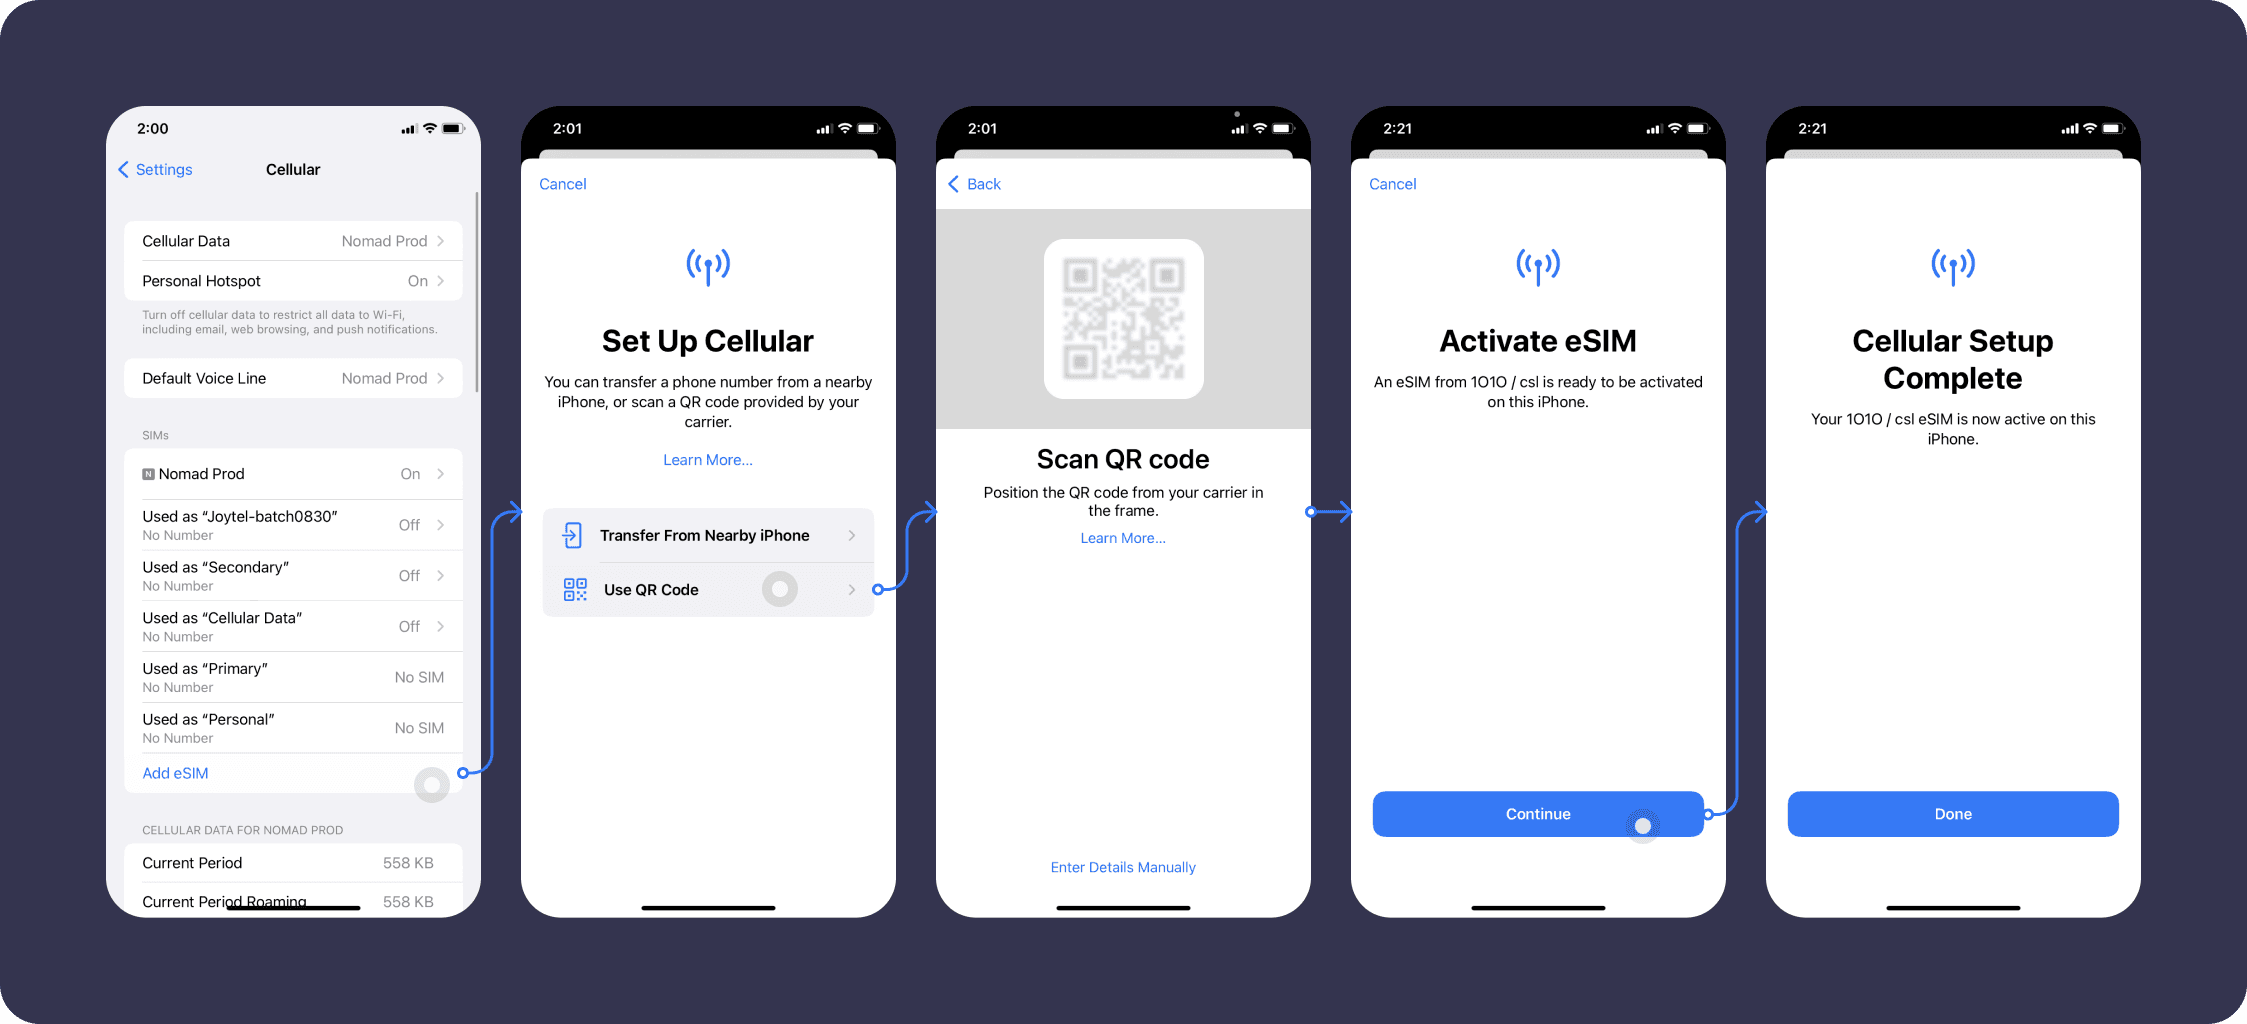
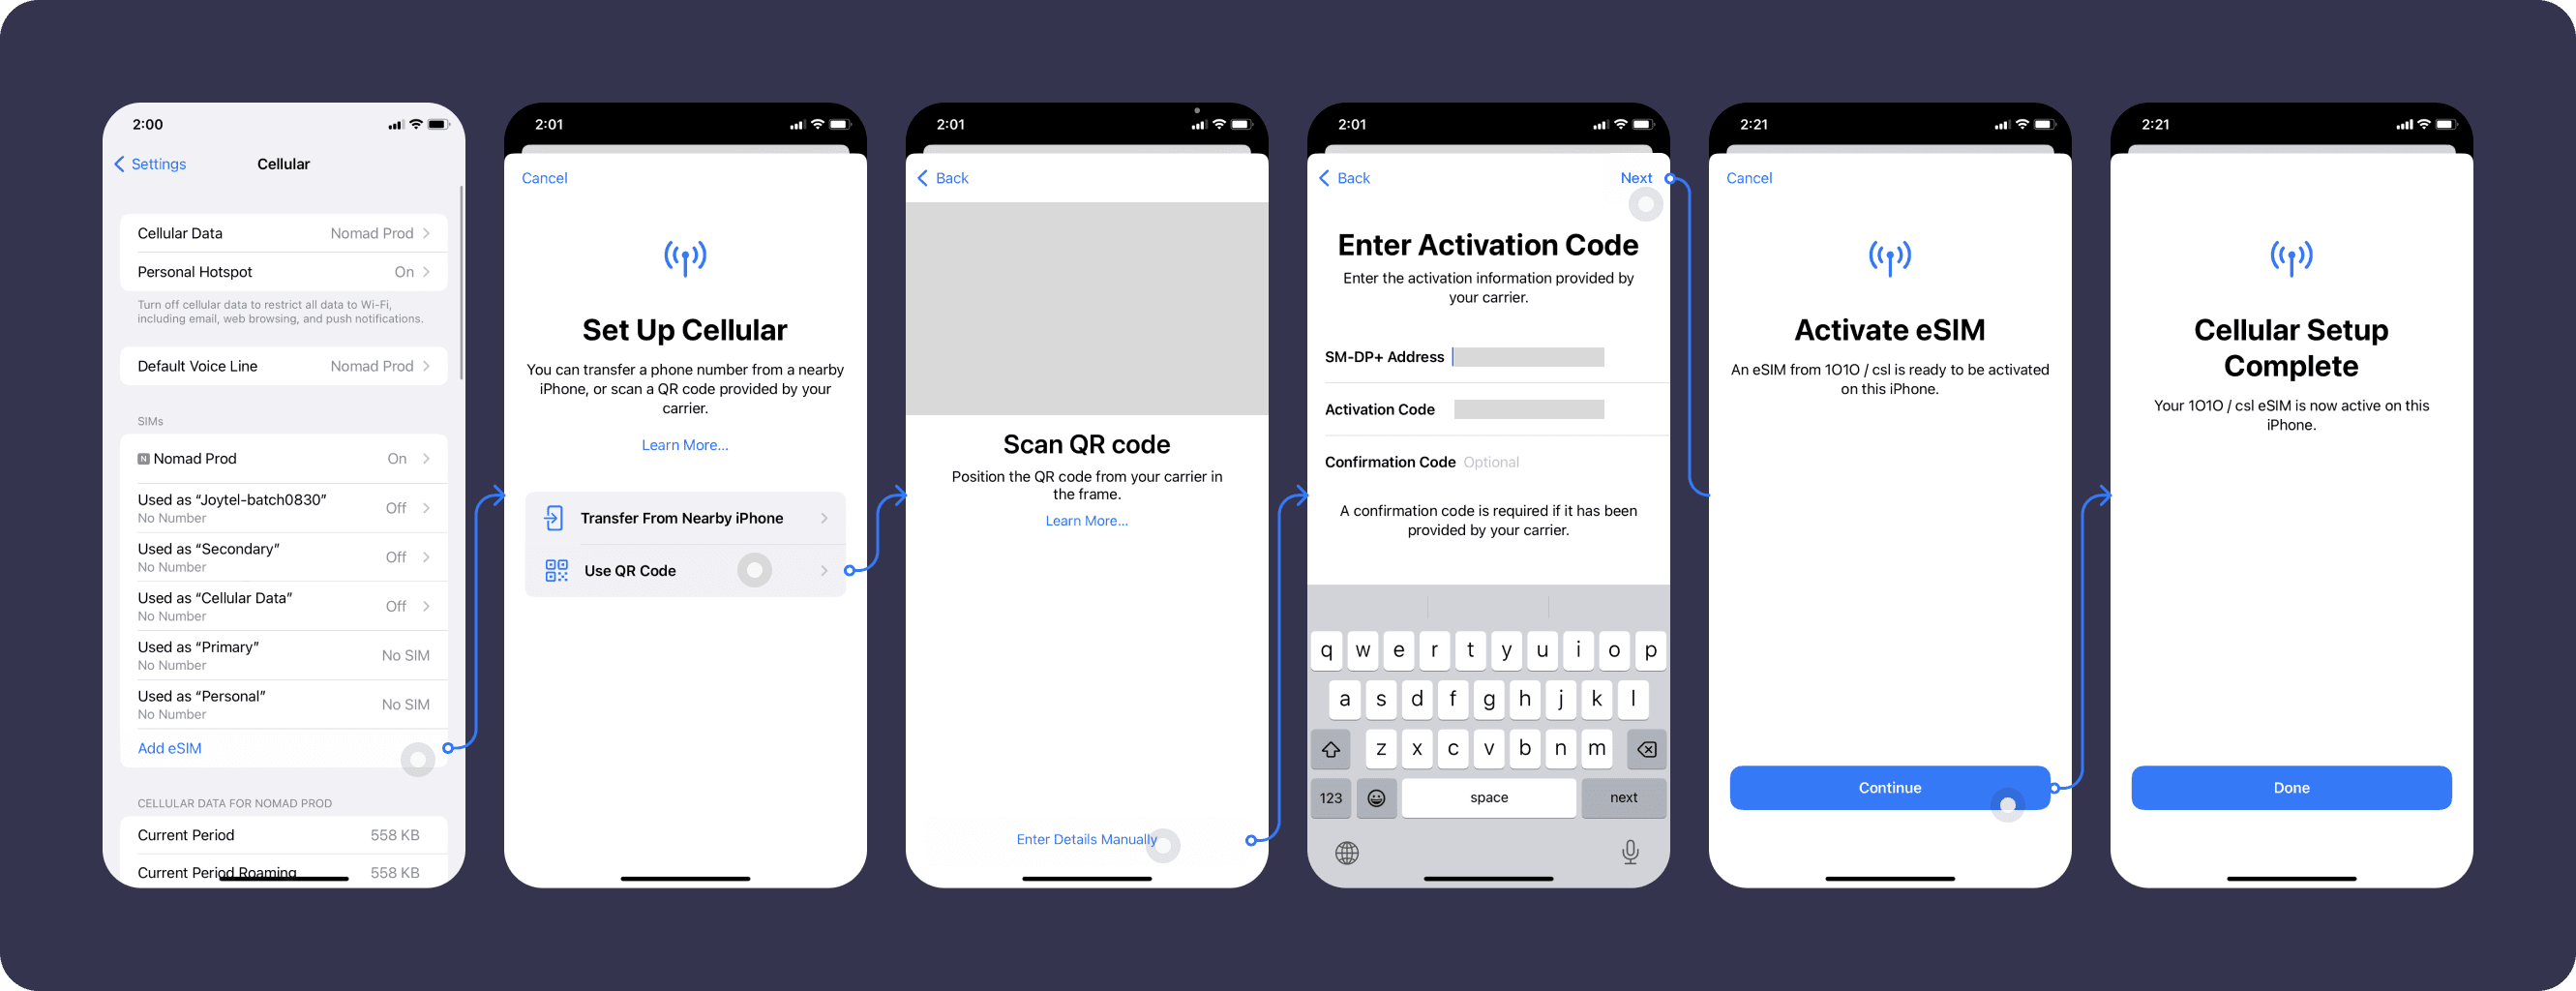
1b). To install your eSIM via Manual Input:
Go to you Settings > Cellular > Add Cellular Plan, click “Enter Details Manually” and enter these information provided in your email.
SM-DP+ Address: (provided in your email)
Activation Code: (provided in your email)
Confirmation Code: not required
If you have trouble getting connected:
It may take up to 10-15min to get connected for the first time. If it takes longer than that, please refer to the eSIM Troubleshooting section before reaching out to customer support.
The installation instructions are also available in the My eSIM section of your Nomad iOS app or website to help guide you along. 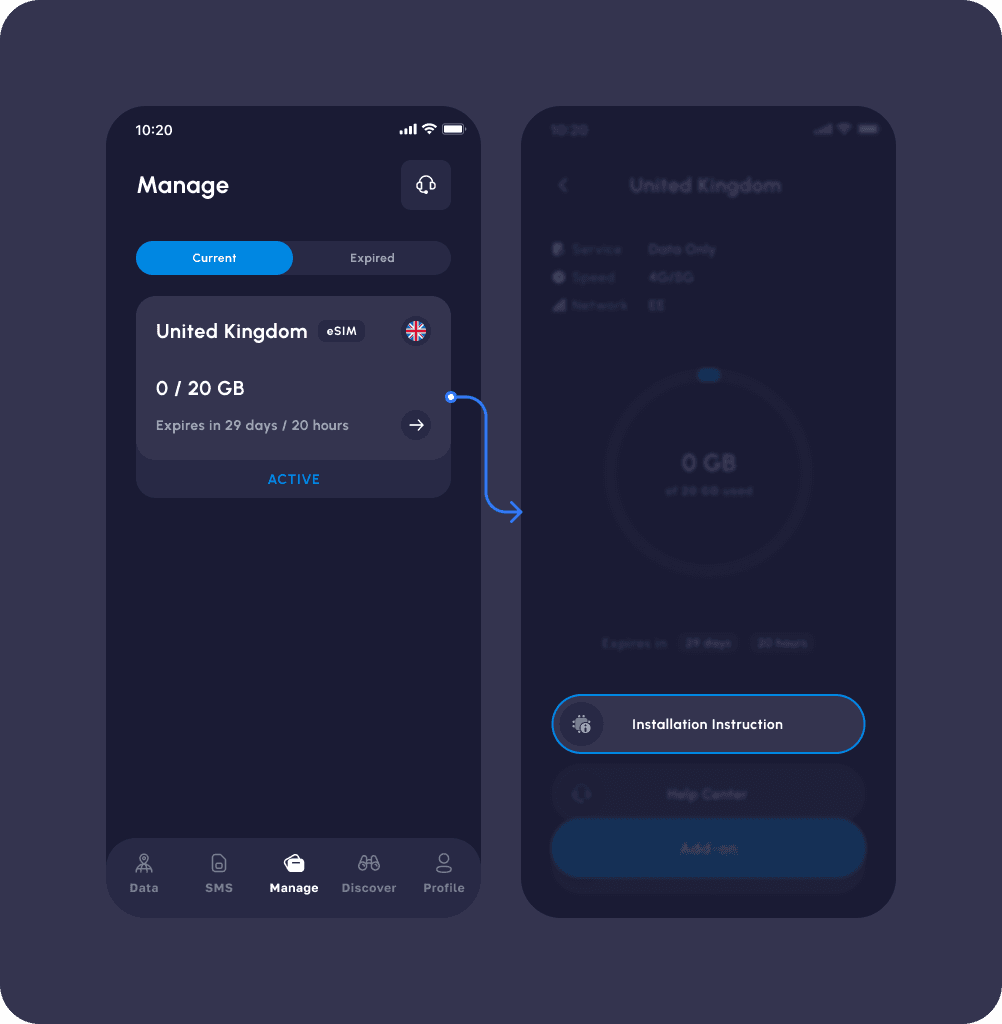
2) When you are ready to use data:
Go to Settings > Cellular and Turn this line on. For your convenience and accuracy, we kindly suggest considering the option to rename this eSIM.
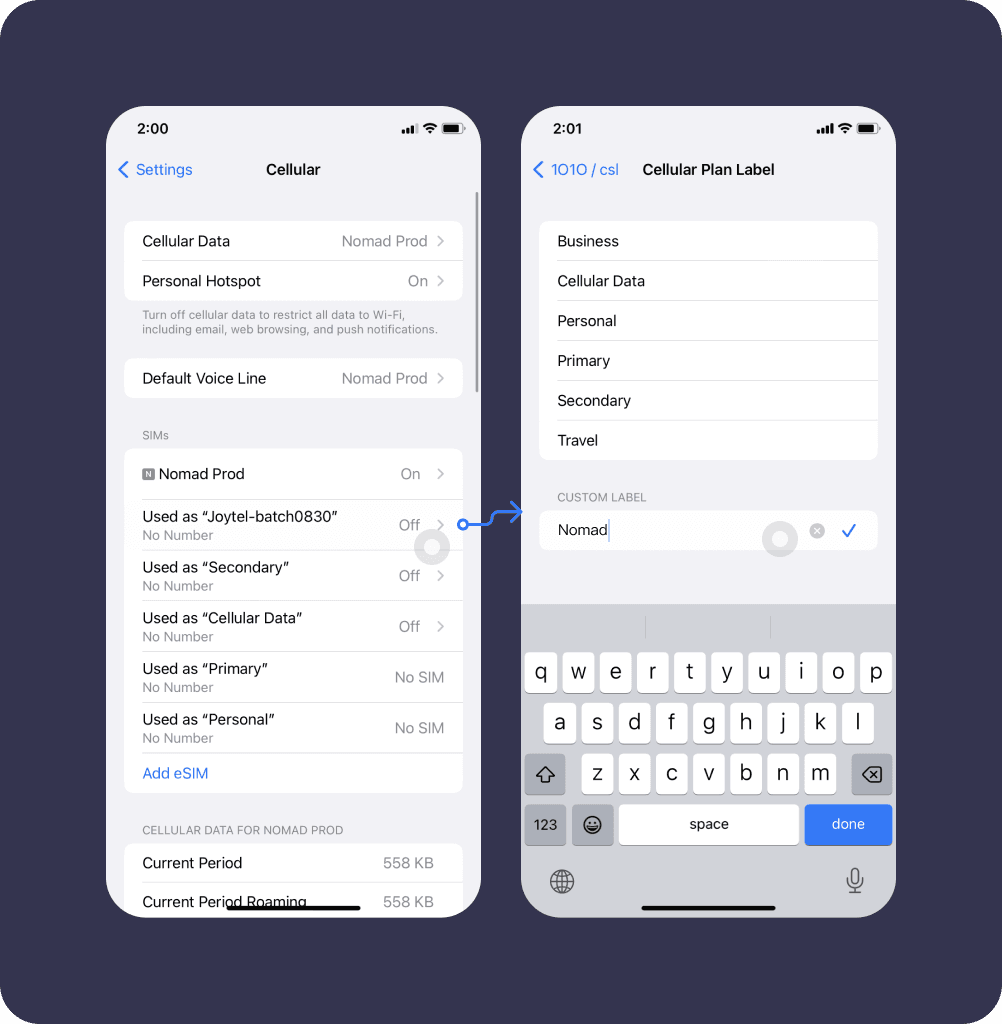
Make sure “Data Roaming” is toggled on and you are selecting the Nomad eSIM for “Cellular Data”.