การติดตั้ง eSIM: การตั้งค่า eSIM ของ Nomad แบบไร้รอยต่อด้วย iOS 17
ปฏิวัติการเชื่อมต่อ: ประสบการณ์การตั้งค่า eSIM ที่ราบรื่นของ iOS 17
วันศุกร์ที่ผ่านมาเป็นวันเปิดตัวผลิตภัณฑ์ที่ได้รับการรอคอยอย่างสูงทั่วโลกไอโฟน 15เพื่อตอกย้ำถึงความมุ่งมั่นของ Apple ในด้านนวัตกรรม ความก้าวหน้าทางเทคโนโลยี และการใช้เทคโนโลยี eSIM โดยเฉพาะในสหรัฐอเมริกา
สอดคล้องกับจิตวิญญาณแห่งความก้าวหน้านี้ iOS 17 จึงได้เปิดตัวการปรับปรุงครั้งสำคัญที่สัญญาว่าจะยกระดับประสบการณ์การเชื่อมต่อของนักเดินทาง คนเร่ร่อนดิจิทัล และผู้ใช้อื่นๆ ด้วยวิธีที่ง่ายกว่าในการติดตั้ง eSIM สำหรับการเดินทางของพวกเขา
ไม่ต้องยุ่งยากกับการสแกน QR Code อีกต่อไป
วิธีที่ง่ายที่สุดที่จะติดตั้ง eSIMคือการสแกนรหัส QR ที่ผู้ให้บริการของคุณมอบให้คุณ อย่างไรก็ตาม วิธีนี้อาจเป็นปัญหาได้หากคุณมีอุปกรณ์เพียงเครื่องเดียวและไม่มีหน้าจอที่สองที่สามารถใช้แสดงรหัส QR ได้ เนื่องจากไม่มีหน้าจอที่สอง ผู้ใช้บางรายอาจตัดสินใจติดตั้ง eSIM โดยใช้การป้อนข้อมูลด้วยตนเองแทน
สำหรับผู้ใช้ iOS 17 ขึ้นไป คุณสามารถบอกลาปัญหาเหล่านี้ได้เลย ไม่ต้องป้อนรหัสเปิดใช้งานด้วยตนเองอีกต่อไป หรือต้องมองหาหน้าจอที่สองเพื่อแสดงรหัส QR ของ eSIM ของคุณ

โปรดทราบ - ผู้ใช้ที่ใช้ iOS เวอร์ชันเก่ากว่าจะต้องเปิดใช้งาน eSIM ด้วยตนเองหรือสแกนรหัส QR จากอุปกรณ์อื่นเมื่อเดินทาง
การติดตั้ง Nomad eSIM ได้อย่างง่ายดาย
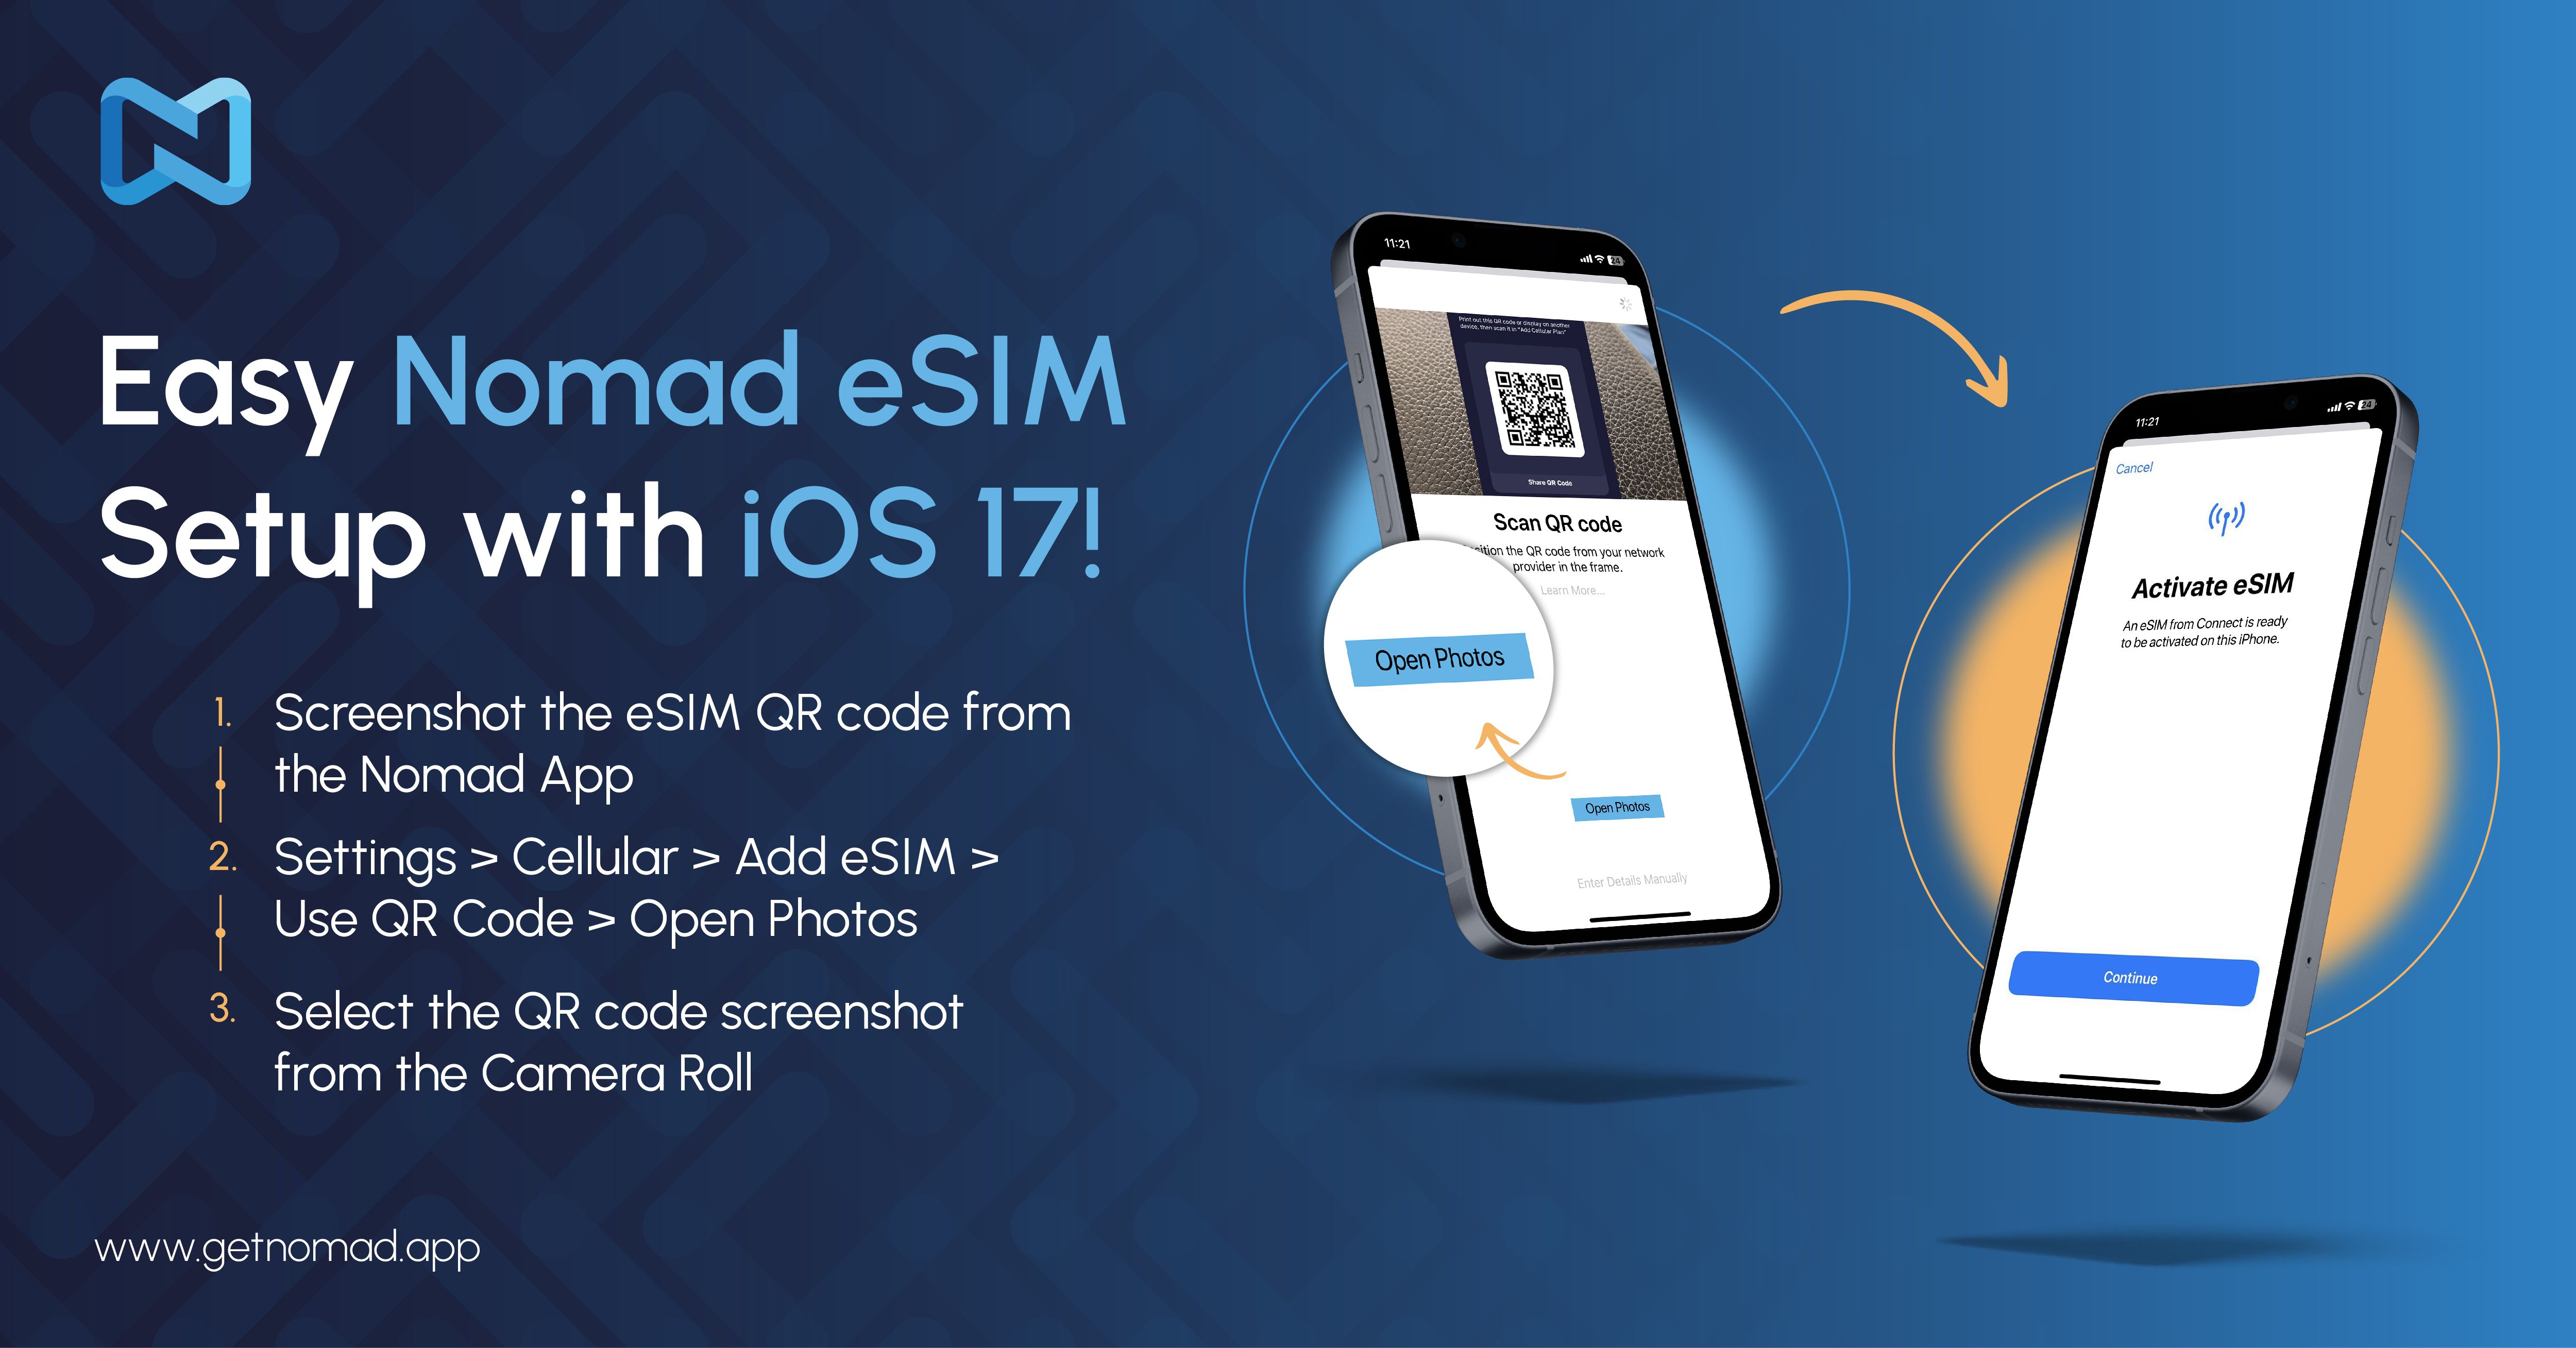
การตั้งค่า eSIM เป็นเรื่องง่ายๆ ในปัจจุบัน ไม่จำเป็นต้องป้อนรหัสอย่างยุ่งยากอีกต่อไป หรือต้องใช้เครื่องมือเพิ่มเติมเพื่อสแกนรหัส QR คุณสามารถทำตามขั้นตอนง่ายๆ เหล่านี้ได้อย่างราบรื่น:
- จับภาพหน้าจอรหัส QR ของ eSIM จากแอป Nomad
- ไปที่การตั้งค่า > เซลลูล่าร์ > เพิ่ม eSIM > ใช้รหัส QR > เปิดรูปภาพ
- เลือกภาพหน้าจอรหัส QR จากม้วนฟิล์ม
โปรดทราบว่าจำเป็นต้องมีการเชื่อมต่ออินเทอร์เน็ตที่เสถียรจึงจะติดตั้ง eSIM ได้ ขอแนะนำให้คุณติดตั้ง eSIM ล่วงหน้า ไม่ต้องกังวลหากคุณยังไม่ได้ใช้ข้อมูล เพราะการติดตั้ง eSIM จะเพิ่ม eSIM ลงในอุปกรณ์ของคุณเท่านั้น และจะไม่ทำให้ eSIM หมดอายุ
ขั้นตอนสุดท้าย - การเปิดใช้งาน Nomad eSIM
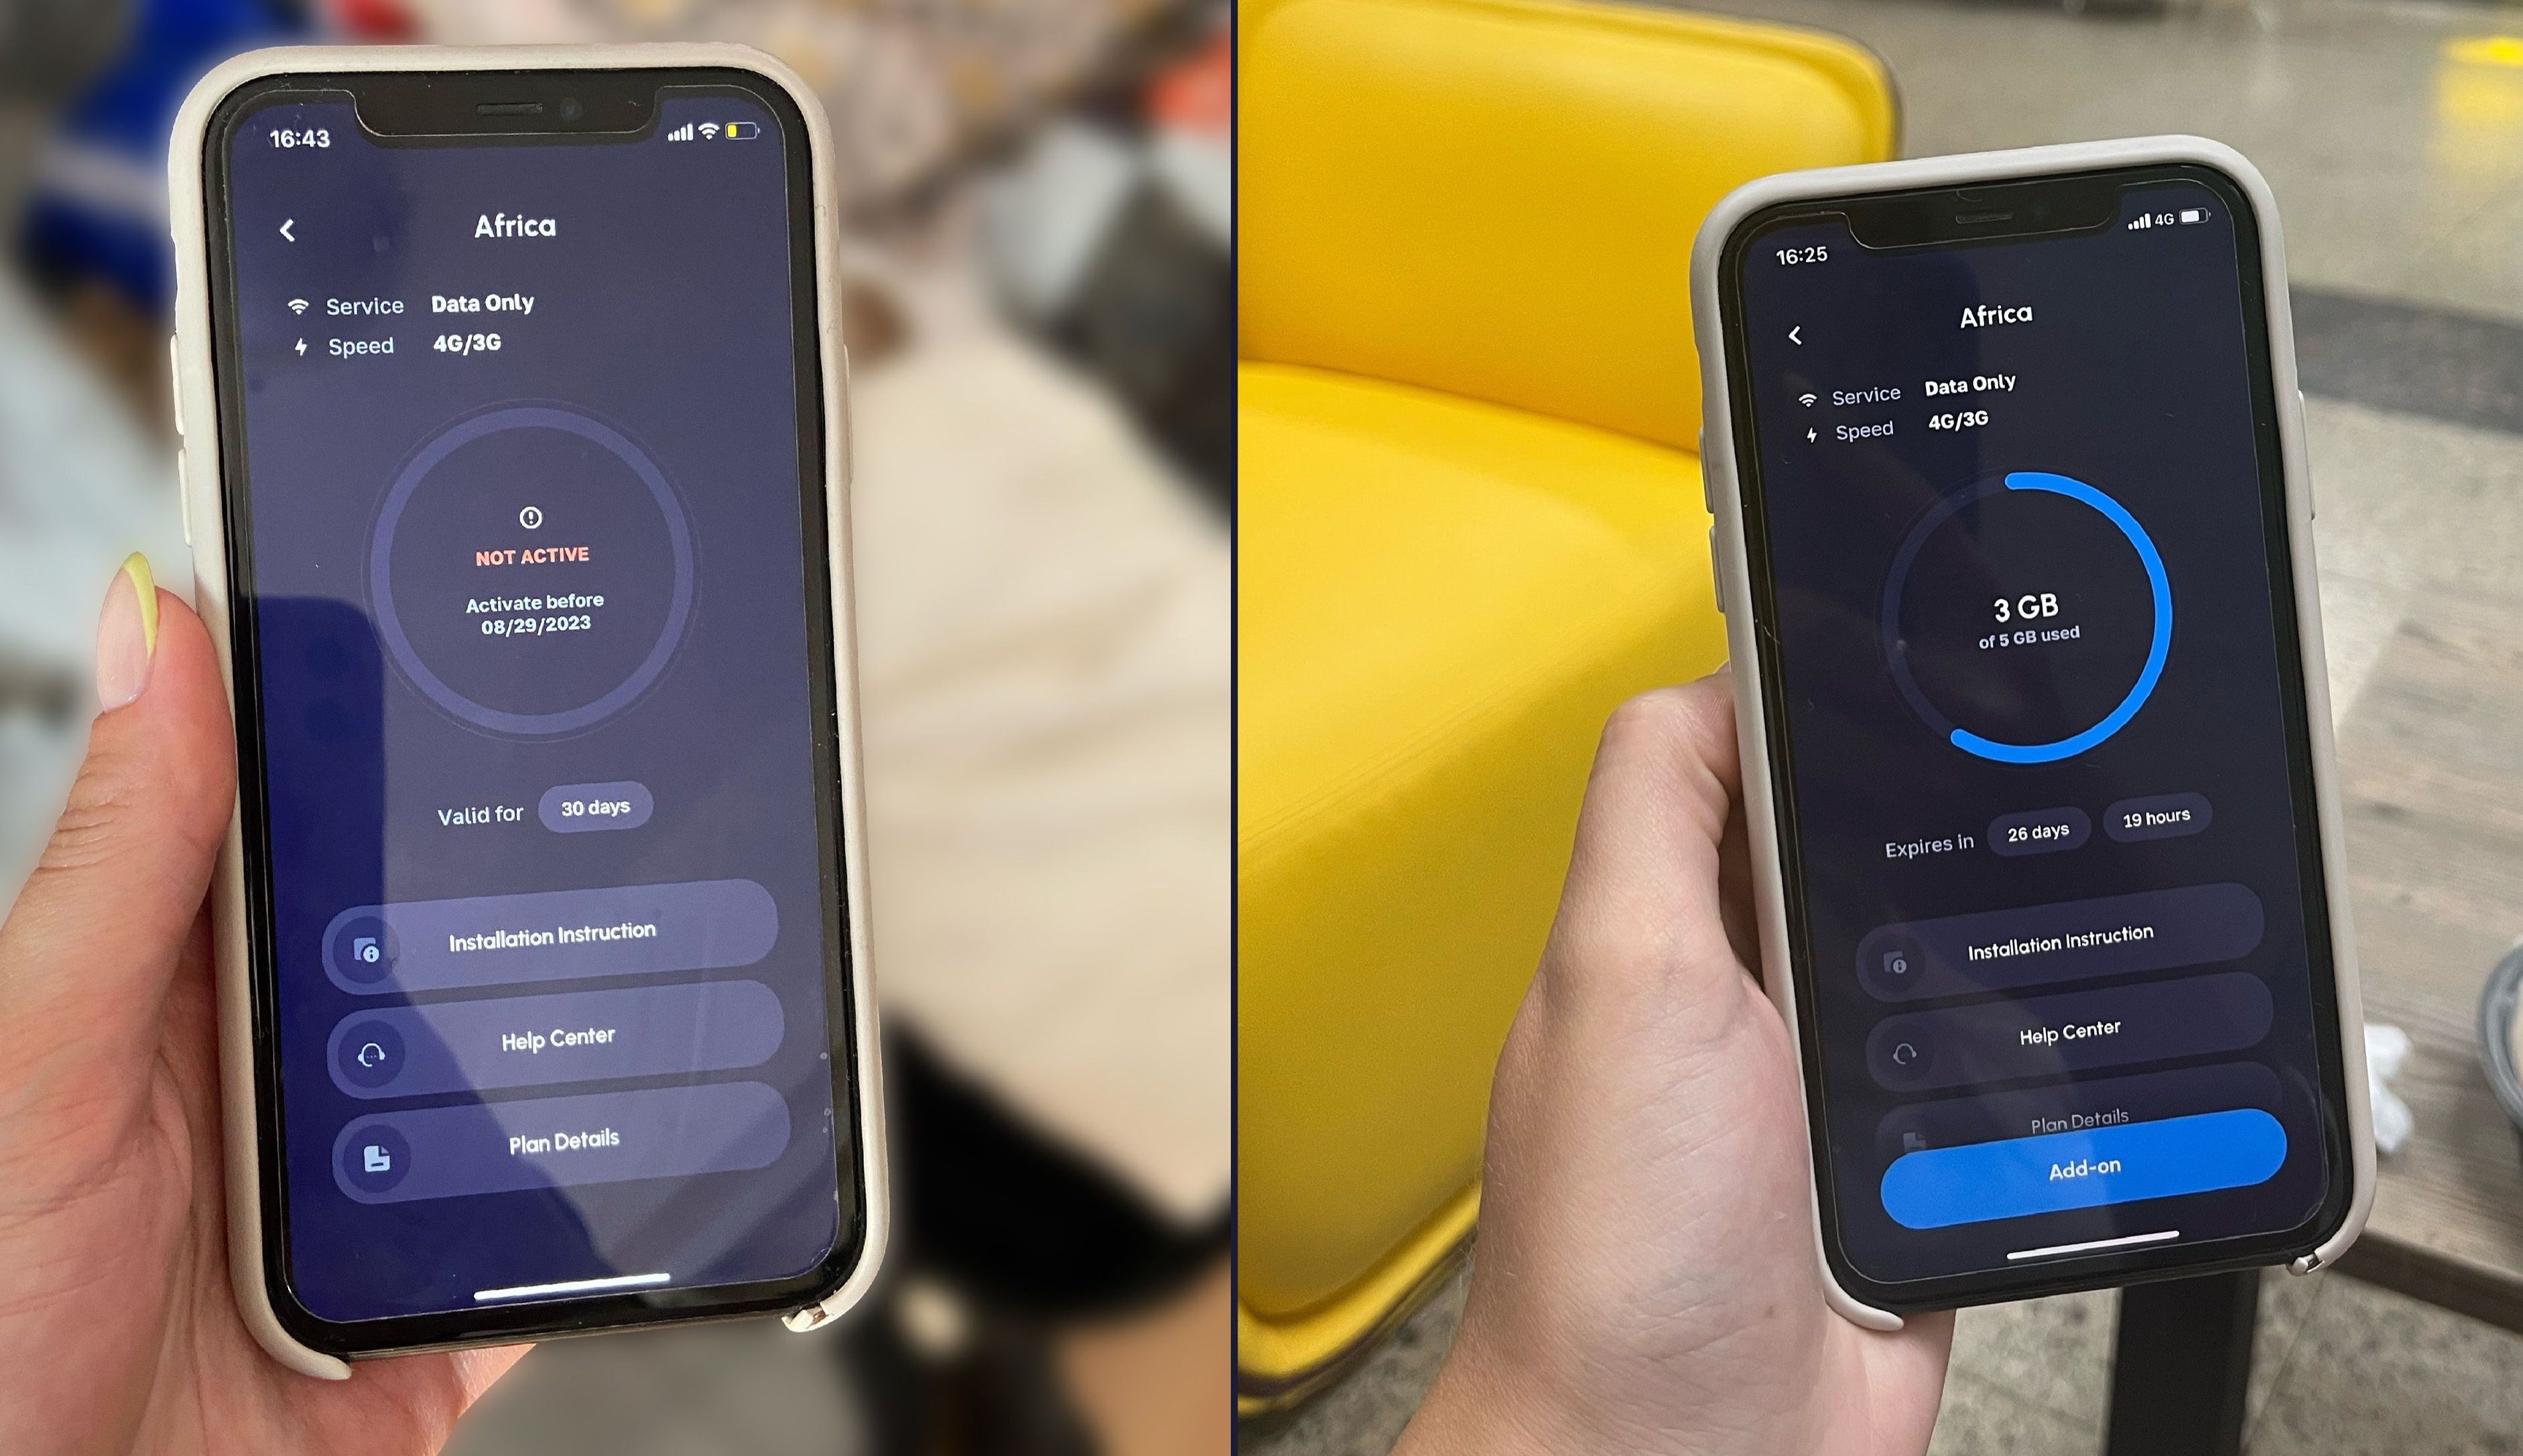
เมื่อคุณพร้อมที่จะใช้ eSIM คุณจะต้องเปิดใช้งาน การเปิดใช้งาน eSIM ต้องใช้การเชื่อมต่ออินเทอร์เน็ตที่เสถียร การเปิดใช้งาน eSIM จะทำให้อายุการใช้งานของ eSIM เริ่มขึ้น ดังนั้นขอแนะนำให้คุณเปิดใช้งานทันทีก่อนบินในขณะที่การเชื่อมต่อยังเสถียรอยู่
ในบางกรณี ไม่จำเป็นต้องเปิดใช้งานด้วยตนเอง และ eSIM จะเปิดใช้งานโดยอัตโนมัติเมื่อคุณมาถึงปลายทางและ eSIM ของคุณเชื่อมต่อกับเครือข่ายท้องถิ่น สำหรับข้อมูลเพิ่มเติมเกี่ยวกับวิธีเปิดใช้งาน eSIM โปรดตรวจสอบอีเมลการติดตั้งที่ส่งถึงคุณหลังจากที่คุณซื้อแผนบริการ
อาจใช้เวลาถึง 20 นาทีเพื่อให้แผนข้อมูลปรากฏว่าเปิดใช้งานในแอป อย่างไรก็ตาม คุณสามารถเริ่มใช้ข้อมูลของคุณได้ทันทีหลังจากกดปุ่มเปิดใช้งานภายในแอป Nomad!

สำรวจโลกไปกับ Nomad ที่ครอบคลุมกว่า 165 ประเทศ
หากคุณเบื่อกับการต้องจ่ายค่าโรมมิ่งราคาแพงและความยุ่งยากในการเปลี่ยนซิมการ์ดในขณะเดินทาง ไม่ต้องกังวล Nomad ช่วยคุณได้!
ค้นพบความสะดวกสบายของโนแมด eSIMให้บริการครอบคลุมกว่า 165 ประเทศ! ก่อนเดินทาง เพียงเลือกแผนข้อมูลที่เหมาะกับระยะเวลาเดินทางและความต้องการข้อมูลของคุณ เมื่อเดินทางถึง ให้เปิดใช้งานในแอป Nomad เพื่อเชื่อมต่อได้ทันที ซึ่งเป็นขั้นตอนที่รวดเร็วและราบรื่น ใช้เวลาไม่ถึงห้านาที
แอป Nomad มีให้บริการทั้งใน App Store และ Google Play Store ทำให้ทุกคนเข้าถึงได้ง่าย เตรียมพร้อมที่จะสำรวจโลกและเดินทางเหมือนคนในท้องถิ่นด้วย Nomad eSIM!