Travel Smart: 8 Essential Tips to Avoid Data Bill Surprises
Keep your data usage in check with these tips
Summary
Traveling to new destinations is an exhilarating experience that offers the chance to explore unfamiliar landscapes, savor different cultures, and create lasting memories. With so much to do and explore while traveling, the last thing you'd want is to have to also worry about is skyrocketing data roaming bills, or even worse, running out of data.
To ensure you stay connected without incurring exorbitant costs during your travels, we have a set of invaluable tips and tricks to help you avoid unexpected data costs while exploring the world.
Once you're done with these tips, you might also find our guide on how to check how much data you have left useful for keeping tabs on your data usage while traveling.

1. Set Data Warnings and Limits
Before embarking on your journey, familiarize yourself with your mobile carrier's data plan. Check the data allowances, roaming fees, and any special international packages they may offer. Understanding the specifics of your plan will help you set realistic data usage goals and avoid unwanted surprises on your bill.
Most Android devices today come with the ability to set data warnings and limits — you will get a notification when your data consumption hits the data warning levels for that cycle; and once the limit is reached, your mobile data will be switched off. By configuring these warnings and limits according to your data plan and allowances, you will be able to avoid unruly surprises with your plans.
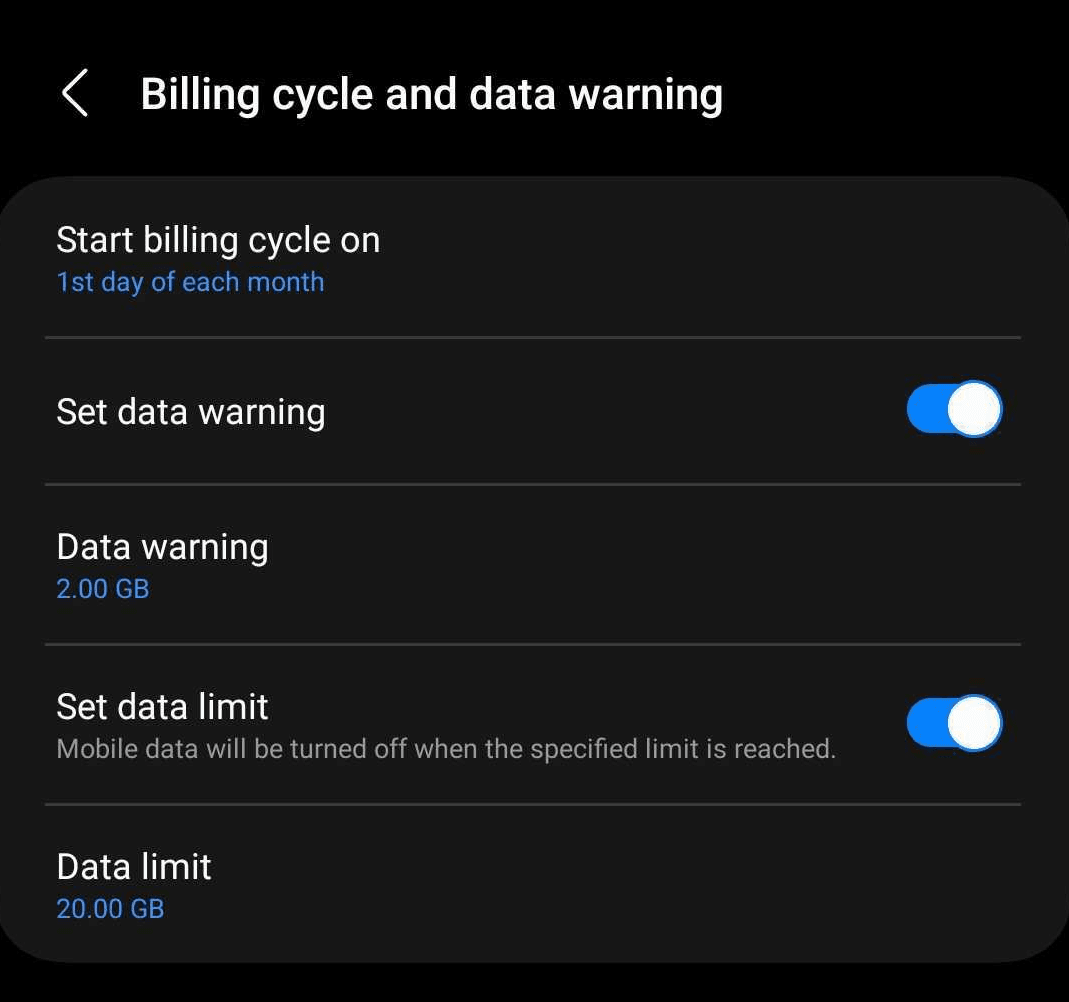
On iOS, there is no in-built function to regulate your data usage. But you can still check in your data usage under Settings > Mobile Data. Whether you are on Android or iOS, remember to reset the statistics prior to your trip to get an accurate view of how much data has been used on the trip!
2. Select The Correct SIM For Data
Most modern smartphones today support multi-sims. If you have multiple SIM (or eSIM) installed, you will be able to select which SIM you want to use to make calls, send messages, and data consumption. If you are purchasing a local SIM or eSIM for your travels, make sure that you have selected the correct SIM for your data. If your data consumption was still set to your home SIM, you could incur unexpected data charges!
If you will be purchasing a SIM or eSIM for your travels, we recommend that you turn off the 'Data Roaming' function on your device first, and turn it on only after you have installed and set your data consumption to the correct SIM. We also recommend that you name your different SIMs — because if everything is just named 'SIM 1', 'SIM 2' etc., it really is easy to get confused.
And remember to turn off 'Allow Cellular Data Switching' to prevent usage from the other SIMs!
For iOS Devices:
- Go to Settings > Mobile Data
- Tap Mobile Data
- Select your preferred SIM for data.
For Samsung Devices:
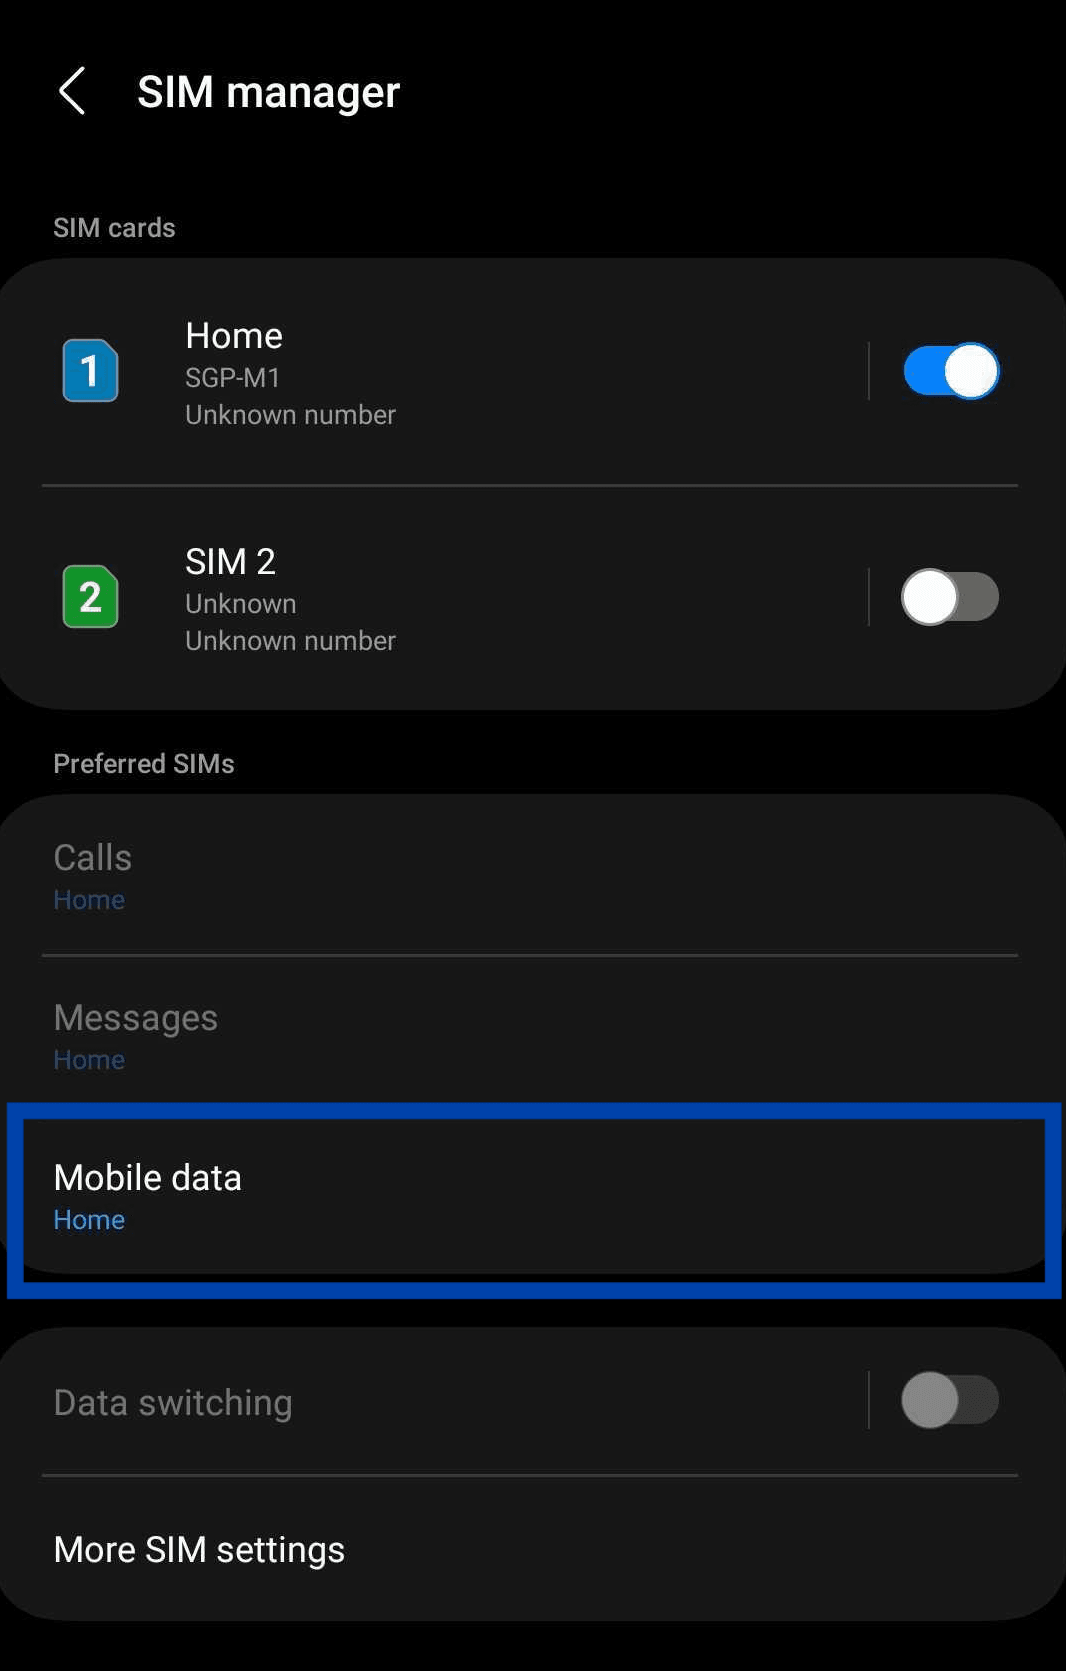
- Go to Settings > Connections > SIM Manager
- Under Preferred SIMs, select 'Mobile data'
- Select your preferred SIM for data
For Google Devices:
- Go to Settings > Network & Internet > SIMs
- Under Your Network, select each SIM to set the preferences for that SIM
- Select **Data **only for the SIM that you will be using your data from
3. Use Wi-Fi Whenever Possible
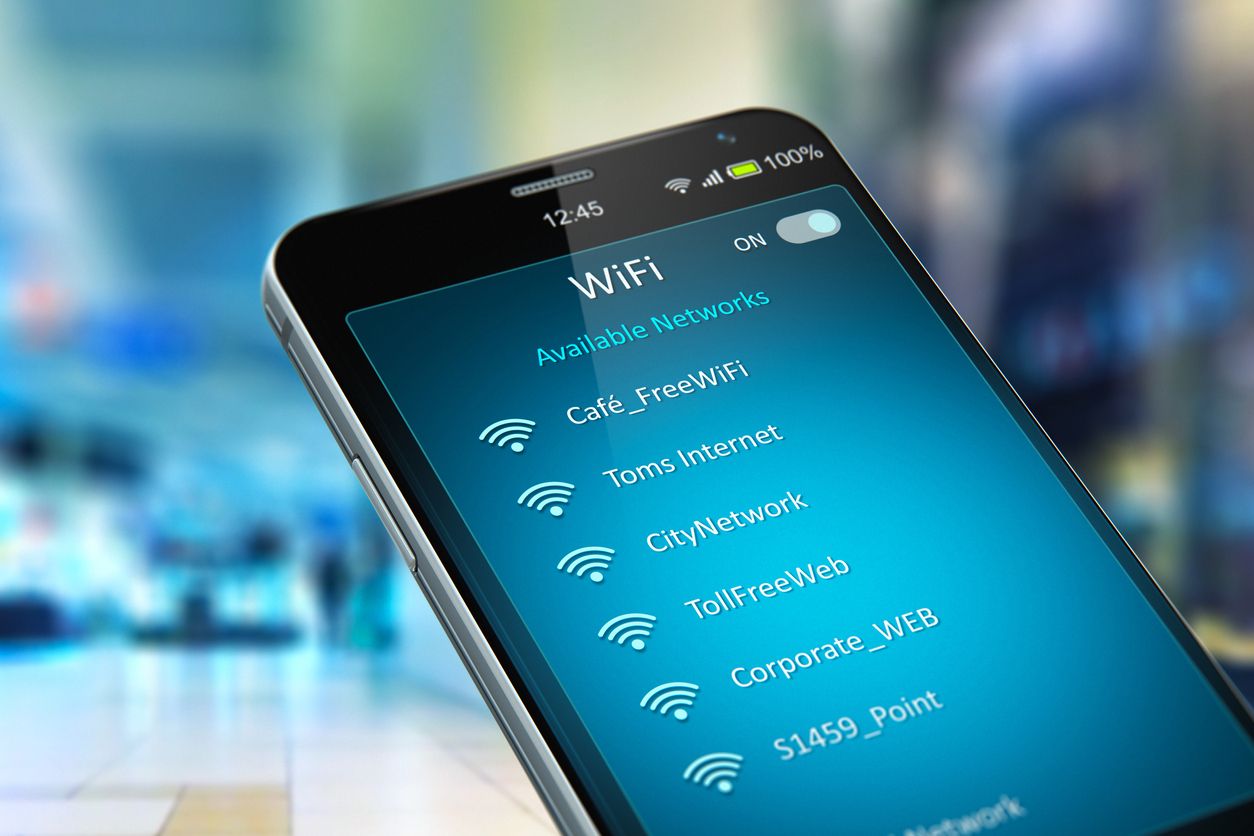
You will be out and about most of the time during your travels, so it is not always possible to stay connected to Wi-Fi. But whenever possible, take advantage of the free Wi-Fi hotspots available! You will usually find free Wi-Fi provided in spaces like hotels, airports, and cafes. Some shopping malls and restaurants also provide free Wi-Fi.
Whenever you find a secure and reliable Wi-Fi network, connect to it to conserve your mobile data. However, exercise caution when accessing sensitive information, such as online banking or personal accounts, over public Wi-Fi networks to avoid potential security risks.
4. Limit App Background Refresh
Many apps continue to consume data in the background, even when you are not actively using them. These apps consume data in the background to sync emails, files, refresh social feeds, and more. This helps to keep your apps and data up-to-date, but if you're traveling, why not also take this chance to slow down and slightly disconnect from the hustle of your daily lives?
You can restrict background data usage for non-essential apps by adjusting settings in your smartphone's operating system. This ensures that only crucial applications access the internet while traveling, saving your precious data for more critical tasks.
For iOS devices:
- Go to Settings > General
- Tap Background App Refresh and turn it off.
For Android devices:
- Go to Settings > Connections > Data Usage > Mobile Data
- Select an app from the usage graph.
- Turn off Allow background data usage
5. Turn On Low Data Mode
If you have iOS 13 or later installed, you can turn on low data mode to reduce data usage. Different apps reduce data usage in different ways, but generally, when you have low data mode turned on, it typically restricts background use of data, automatic downloads and updates, as well as reduced quality when streaming — essentially covering most of the tips in this article.
Here's how to turn on low data mode for your iPhone:
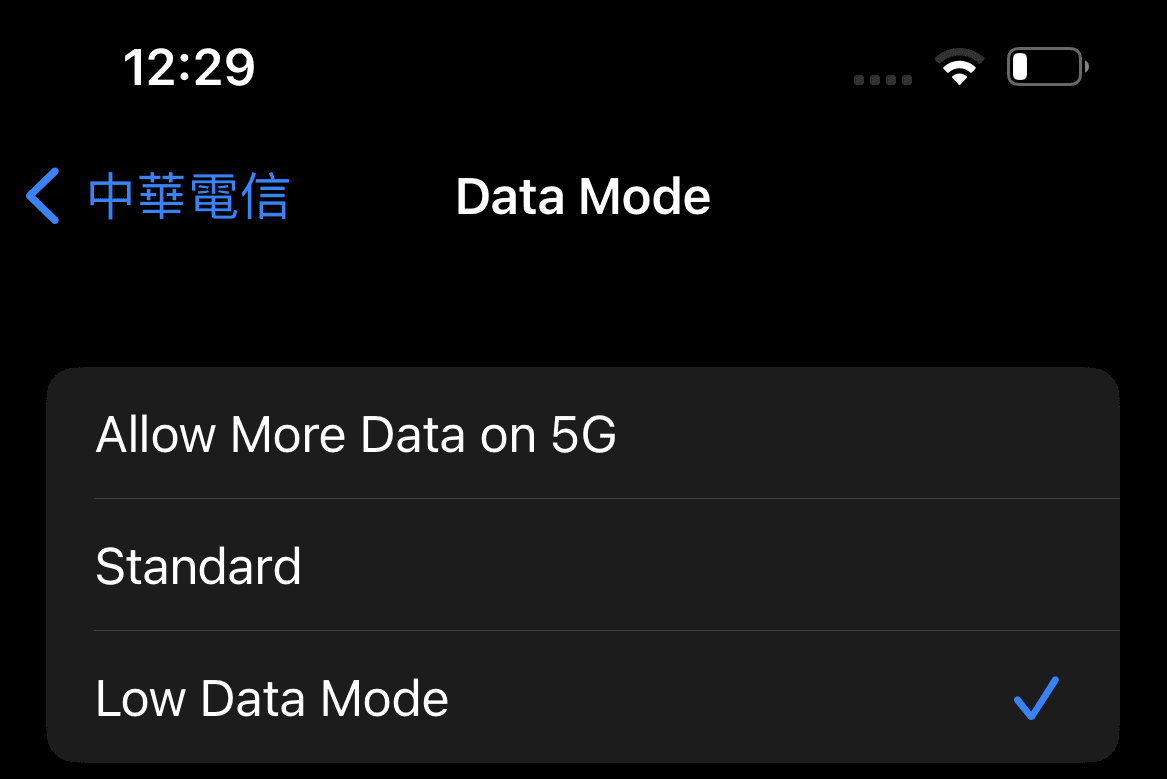
- Go to Settings > Mobile Data.
- Tap the phone line using data.
- Select Data Mode and turn on Low Data Mode.
On Android, there is a similar function, but it's called 'Data Saver Mode'. If there are apps that you absolutely still require background data usage, it is possible to add these apps to the exclusion list as well.
Here's how to turn on data saver mode for your Samsung smartphone:
- Go to Settings > Connections > Data Usage > Data Saver.
- Turn on Data Saver.
And how to switch it on for your Google device:
- Go to Settings > Network & Internet > Data Saver.
- Tap Use Data Saver.
6. Turn Off Wi-Fi Assist
You can also reduce data usage by turning off Wi-Fi Assist, also known as Network Switch on Android. Wi-Fi assist works by switching your connection to cellular network when your Wi-Fi signal gets too weak. It is enabled by default to ensure a stable network connection — which is great for daily use, but could lead to unexpected roaming charges when traveling.
Here's how to turn off Wi-Fi Assist on your iPhone:
- Go to Settings.
- Tap Mobile Data.
- Scroll to the bottom and turn off Wi-Fi Assist.
And how to turn off Network Switch on your Android:
- Go to Settings.
- Tap Connections> Wi-Fi.
- Tap the three dots in the corner and select Advanced.
- Turn off Switch to mobile data.
7. Embrace Offline Modes
Whether it is maps, audiovisual content, or even browser pages, many apps today allow you to download content to your devices. Although it is definitely not possible to download and save the entire internet to your device, you can start by downloading the essential resources that you might need for your trip during your planning stage.
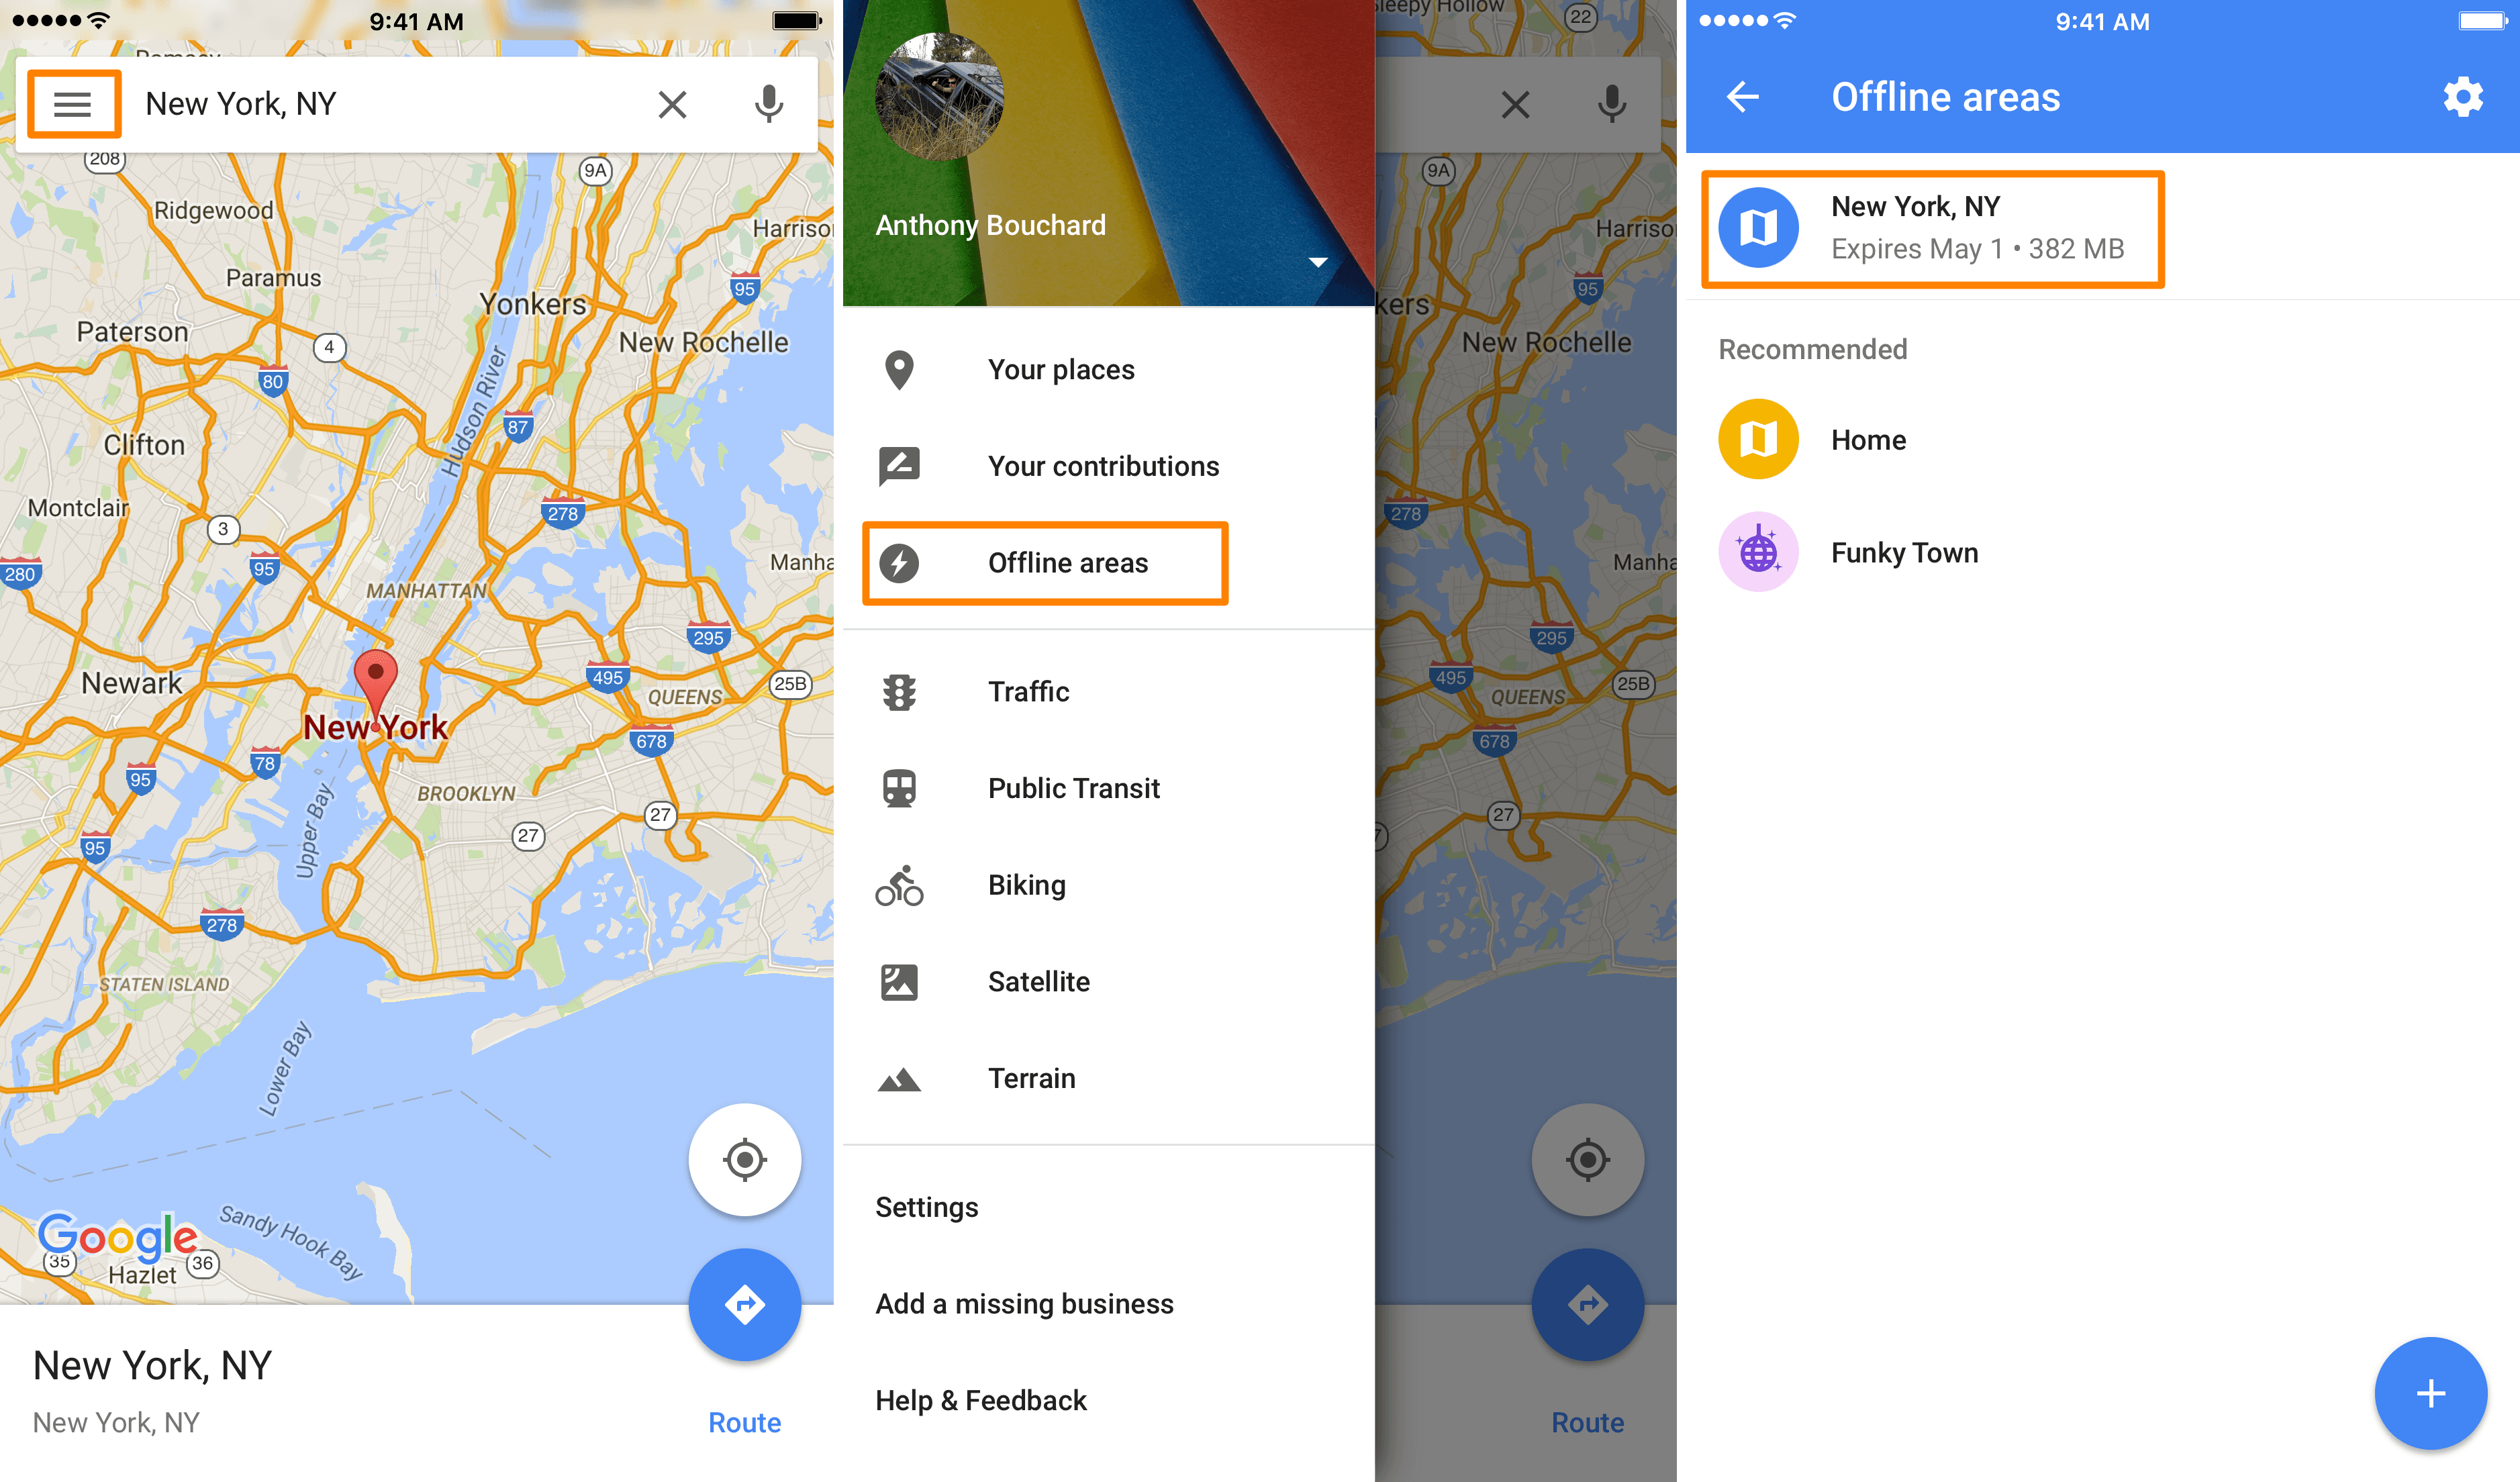
Instead of relying on real-time navigation, download offline maps of your destination before you set off. Apps like Google Maps, HERE WeGo, and Maps.me allow you to download maps for specific regions and use GPS without consuming mobile data. This way, you can navigate without an internet connection and save significant amounts of data.
Streaming music and video content can quickly drain your data. Before traveling, download your favorite music, podcasts, and movies onto your device, so you can enjoy entertainment offline. Additionally, some music streaming apps have offline modes that allow you to save playlists for later listening without using data.
Many browsers also allow you to download HTML pages to your device. If there are some pages that you are likely to refer to during your trip, you can download and save them in advance so you can refer to it offline. And especially if those pages are image heavy, then downloading them in advance would help to cut down on your data usage!
8. Turn Off Auto Backups
Whether you are on iOS or Android, it is likely that your data is being backed up to some form of cloud storage. Your photos and files will be regularly synced to the cloud storage - whichever you are on - and this could cause significant data usage unknowingly!
To avoid excessive use of data due to the auto backups, switch your settings to only sync and back-up the data on Wi-Fi. You can do so from your device settings page or individual app settings if you have additional apps that also have regular data syncing.
